Showing posts with label StoreApp. Show all posts

Friday, January 22, 2016

Dependency Injection - Intro

This gonna be post series which I gonna continue .. Because this is bit complex and without theoretical part hard to understand.

Fist thing first.. Lets move with theoretical background of it with this post

 Assume this scenario.. - Entire Post sequence will use  this as example
There is student registration system we need to develop solution for student registration  

Here is our usual MVC code.


public class Student
   {
       public int StudentId { getset; }
       public string StudentName { getset; }
       public string RegId { getset; }
       public int Age { getset; }
 
 
       public IEnumerable<Student> GetStudents()
       {
           return new List<Student>();
       }
   }
 
Model Class 
 
public class StudentController : Controller
    {
        private readonly Student _student;
        public StudentController()
        {
            _student = new Student();
        }
        // GET: /<controller>/
 
        public IActionResult Index()
        {
            var data = _student.GetStudents();
            return View(data);
        }
    }
Controller Class 


In this way Model and controller is tightly coupled ( change of one class will effect other ) .  This way is not good in large scale projects a importantly. ( not recommend in any case )

You can find advantages and disadvantages of tight coupled code in OOP concepts.


  Dependency Injection


Dependency injection is the best way to create loose coupled code and resolve dependencies among the  classes .

In dependency injection some other class is responsible for injecting the dependencies in to client class(ex: Student Controller) we called it injector class at application run time.


here is object Diagram of it


Here is code how its look like with DI

public class Student:IStudent
   {
       public IEnumerable<Student> GetStudents()
       {
           return new List<Student>();
       }
   }
 
   public interface IStudent
   {
       IEnumerable<Student> GetStudents();
   }


public class StudentController : Controller
    {
        private readonly IStudent _student;
        public StudentController(IStudent student)
        {
            _student = student;
        }
        // GET: /<controller>/
 
        public IActionResult Index()
        {
            var data = _student.GetStudents();
            return View(data);
        }
    }
 
Enjoy Coding .. next post is on the way

Sunday, June 7, 2015

Alternative way for enable developer mode in windows 10 device

Hi ,

Have you ever seen bug when going to enabling developer mode in windows 10 preview (IP)? The application crashes.

Now how we enable developer mode for application development ?

There is option available. When we are deploying apps with side loading in windows 8/8.1 we are doing the policy editing to allow app installation in client machine. the same is helpfull here too

Open your group policy editor  -> Computer Configurations-> Administrative templates -> Windows Components -> App Package development 

In there enable
Allow development of windows store apps and installing them from integrated development environment ...
and
allow all trusted apps to install 


You are done and enjoy  

Friday, January 23, 2015

Microsoft Windows 10 Event.


Saturday, October 11, 2014

Windows Azure Mobile Authentication Service

Magic with Azure mobile services is easy handling in Authentication for users. It allows you to authenticate users
1. Microsoft Account
2. Facebook Account
3. Twitter Account
4. Google Account
5. Azure Active Directory

What else developer need..

To enable all of those authentications you need to have apps running on those platforms. Url's for creating apps on each service provider is given below (Creating app on your hand *Get the developer manual help according to each technology)

1. Microsoft - https://account.live.com/developers/applications
2. Facebook - https://developers.facebook.com/ (Click on App's menu)
3. Twitter - https://apps.twitter.com/app/new
4. Google - https://console.developers.google.com/project

** In every instance that you create apps use your Azure Mobile Service Url 
HERE is URL for Microsoft Login
for json backend :https://<mobile_service>.azure-mobile.net/login/microsoftaccount
for .NET backend :https://todolist.azure-mobile.net/signin-microsoft


With later posts you can see how to use Azure Active directory

Start from the beginning

1. First login to your Azure portal and go to Mobile Services


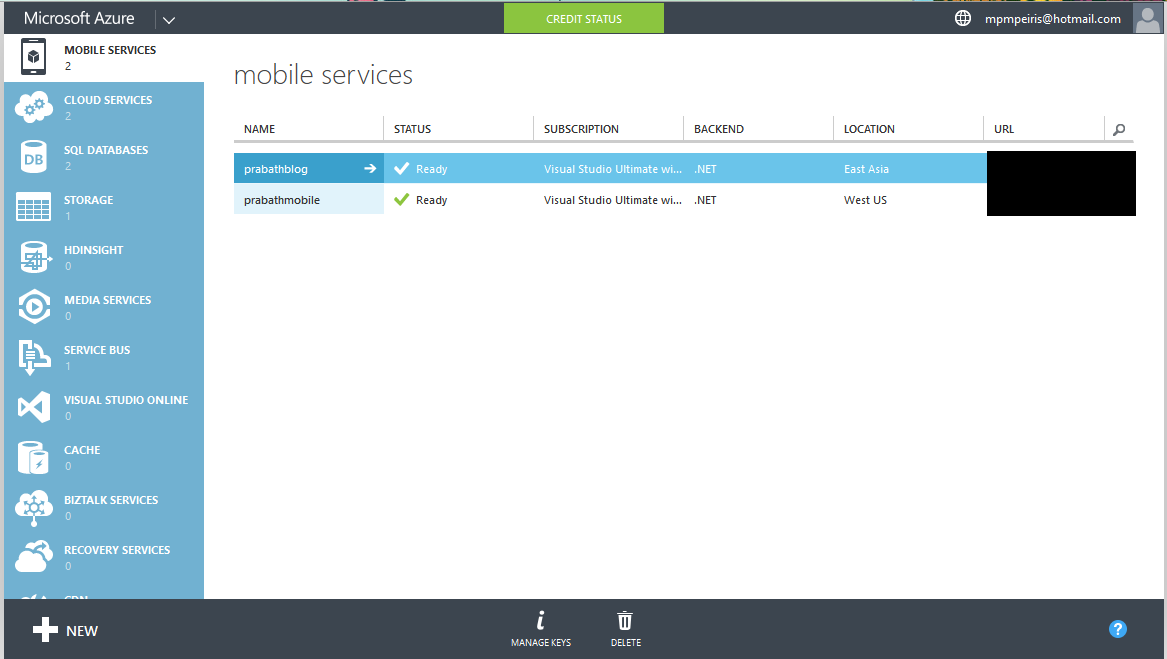
2. Then select your Mobile Service , in here I have already created Mobile Service for the Azure Mobile Services post named as prabathblog. Select it and go inside. Then select IDENTITY  Tab from menu.


3. Fill the values according to the Login provider with details


4. Then go to the dashboard and download the app.

5. Use this code to authenticate in client side

        /// <summary>
        /// Simple authenticate
        /// </summary>
        /// <returns></returns>
        private async Task AuthenticateAsyncSimple()
        {
            while (user == null)
            {
                string message;
                try
                {
                    user = await App.MobileService
                        .LoginAsync(MobileServiceAuthenticationProvider.MicrosoftAccount);
                    message =
                        string.Format("You are now logged in - {0}", user.UserId);
                }
                catch (InvalidOperationException)
                {
                    message = "You must log in. Login Required";
                }
 
                var dialog = new MessageDialog(message);
                dialog.Commands.Add(new UICommand("OK"));
                await dialog.ShowAsync();
            }
        }


Enjoy your code


Wednesday, September 10, 2014

Starts with MVVM

With the growth of programming and application development  there are major requrement that emerged the design patterns. Such as MVP(Model View Presentation) and MVC (Model View Controller) are common design patterns that allows developer to isolate codes. Bu the advanced features of XAML such as data biding, data templates, commands and on demand interaction between application and logic's guide world to MVVM (Model View ViewModel)

MVVM basically derived from the MVC design pattern. It clearly  create separation between these MVVM layers more than MVC.


Model contains all abstraction of data  not any logic's behind data. View is contains XAML views still not the logics. Importance is Model and view are not directly inter action with each other.


ViewModel Contains all  business logic's and data bind properties such as Collections. And it will interact with the View and Model. It takes notifications from model and send them to View as well as other way around.

Ex: If new item added to collection in view It automatically notify and update the View without any interaction.

Study Simple MVVM code here


Full Code In Media Fire 
http://bit.ly/MvvMDemo


Friday, September 5, 2014

Variable Size Tile App Template By Me

This is One of Customized template that I created for windows 8. Took some of the Templates of codeplex as strach. It provide color bound variable aized grid in Main page and VAriable sized grid as musing datiddle page.


You can edit data sources as you wish by using classes in data Model. Those classes are in same manner that sample data templates provided by microsoft.


In detail page this template provide Rich textbox for display detailed descripton.


and some other colums for misalanious data.


You can change the layout and order of the grid view by editing LayoutClass directory ,


just edit the

_sequence = new List<Size> {

                LayoutSizes.PrimaryItem,

                LayoutSizes.SecondarySmallItem, LayoutSizes.SecondarySmallItem,

                LayoutSizes.SecondarySmallItem,

                LayoutSizes.SecondaryTallItem,

                LayoutSizes.OtherSmallItem, LayoutSizes.OtherSmallItem, LayoutSizes.OtherSmallItem,LayoutSizes.SecondaryTallItem, LayoutSizes.OtherSmallItem, LayoutSizes.OtherSmallItem,

                LayoutSizes.OtherSmallItem,LayoutSizes.OtherSmallItem,LayoutSizes.SecondaryTallItem,LayoutSizes.OtherSmallItem,LayoutSizes.OtherSmallItem,LayoutSizes.OtherSmallItem,

                LayoutSizes.SecondaryTallItem,LayoutSizes.OtherSmallItem,LayoutSizes.OtherSmallItem,LayoutSizes.OtherSmallItem,LayoutSizes.OtherSmallItem,LayoutSizes.SecondaryTallItem,

                LayoutSizes.OtherSmallItem,LayoutSizes.OtherSmallItem               

            };


in constructor of each class


http://bit.ly/VarGrid Download and Rate


Tuesday, July 15, 2014

Azure Mobile Services ( Start to build)

Windows Azure cloud application provide quite amazing solutions for Mobile backed services. With Azure cloud applications allows you to store structured data (files and SQL Azure) , Authentication interrogation to Mobile applications and user updates via push notifications. Specially Azure is not only for Windows (Microsoft ) Products. It supports Window 8, Windows Phone , Android and iOS with different development platforms such as native platforms and Xamarin.

Lets build first Cloud app

1. First Log in to your Azure Portal and click on New button in left corner


2. Then from prompt Select Compute -> Mobile Service-> Create

3. With the next prompt add URL for your Mobile service in URL field. With Database field if you have already created database for mobile application back end select it if it is not select option Create new SQL Database instance  or Create Free 20MB SQL Database Option

Select your region and what kind of backed you need to have. it has .NET and Javascript backed. Choose your choise

If you plan to include Push notification with your app tick on  Advanced Push Notification Check box


4. If you checked Advanced Push Notification Check box this step you find the Push Notification Settings prompt. Azure notification hub is cross platform push notification service that can simultaneously broadcast notifications across the devices.

Create namespace to notification service and name your push notification Hub


5. Then you can define the Database Settings. You can define new database name , If you already have database server select it or else create new database server and give the credentials for it as you want.
If you need to make advanced changes to the database tick on Configure Advanced Database Settings  Check box.

With Advanced database settings you can limit the database capacity and define the character encoding for the data


Then our web service is up and it take few seconds to configure and make it online


Once our Service is created the screen is like this


Select the platform that you need to create app that using this service and scroll down to to GET STARTED area.

Expand the Create new App. (this depend on what you select in Choose Platform Area Select the language C# or JavaScript and download the applicattion.

Run it and enjoy your first cloud app