Tuesday, April 26, 2016

Easy Admin Dashboard with MVC

Today I'm going to introduce you create responsive , mobile friendly admin dashboard with MVC project.

There are multiple bootstrap admin dashboard templates and one of the most commonly used and strongest one is Admin LTE. This is totally open source project.

This will provide you great UI with documentations. Click here to see documentations.

This project is owned to Almsaeed Studstudio . 


What i'm doing is removing some dependencies with 3rd party API's and make them call internally.


Lets begin with Visual studio


1. Start new empty MVC project 
2. Install Nuget Admin_Dashboard from nuget
3. Create Home empty controller and run


Now You are up and running this awsome template 


 Then afterwards you are on your own and find the relevant UI documentations form AdminLTE and use the components. all elements automatically will found with your project


You can use this template on MVC / Angular projects using visualstudio easyly 


**please ignore if there are some script error if it comes when installing nuget

Enjoy  :)


Sunday, February 28, 2016

Mongo DB With C# API V2

Let's start and check the latest  MongoDb Driver for C# (Mongo V2).

If you are not still configured your Mongo Server yet. see this Post

If you need some guide on old MongoDb Driver V1. See this Post

New Features In V2

  •  Async Support 
  • Method Naming convention with helpful names ( SelectOne, InsertOne etc) 
  • Legacy API Support 

Here is the Db Structure and Sample Data I'm going to Use 

 DB Structure : Create Collection in Mongo Server With name of  Students


Here is some sample Json Data for Students Collection 

/* 1 */
{
    "_id" : ObjectId("56c3206ddaa3d39f5a130bcc"),
    "StudentId" : 1,
    "Name" : "Saman kumara",
    "Address" : "Sample"
}

/* 2 */
{
    "_id" : ObjectId("56c69ed3926ffb2c80ed00bb"),
    "StudentId" : 2,
    "Name" : "Piyal kumara",
    "Address" : "adadasd"
}


1. Create New MVC Website from Visual Studio

2. Add New Class to the models called Student

public class Student
    {
        [BsonRepresentation(BsonType.ObjectId)]
        public string Id { getset; }
        public int StudentId { getset; }
        public string Name { getset; }
        public string Address { getset; }
    }


3. Install MongoCsharpDriver Nuget package from the Nuget


4. Create ConnetcionString  and Database Variables for mongodb by  R-click on Project -> Properties -> Settings Add relevant values of variables.


5.  Create DbContext Class MongoDbContext 

public class MongoDbContext
    {
        public IMongoDatabase Database;
 
        public MongoDbContext()
        {
            var client = new MongoClient(Settings.Default.ConnectionString);
            Database = client.GetDatabase(Settings.Default.Database);
        }
 
        public IMongoCollection<Student> Students
        {
            get { return Database.GetCollection<Student>("Students"); }
        }
    }


Get data From Mongo

1. Add following code to the HomeController
 Create Private property of Context and initialize it

private MongoDbContext _context { getset; }
 
       public HomeController()
       {
           _context = new MongoDbContext();
       }
       // GET: Home
       public  ActionResult Index()
       {
           //Get Data from Db
           ViewBag.Data = _context.Students.AsQueryable().Select(a=>new Student { Name=a.Name,Address=a.Address ,StudentId=a.StudentId}).ToList();
           return View();
       }

2. Edit The View as following

@{
    ViewBag.Title = "Index";
}
 
<h2>Index</h2>
@Html.ActionLink("Create""Create")
 
 
<table class="table">
    <tr>
        <th>
            Student Id
        </th>
        <th>
            Name
        </th>
        <th>
            Address
        </th>
        <th>
 
        </th>
    </tr>
 
    @foreach (var stu in ViewBag.Data)
    {
        <tr>
            <td>
               @stu.StudentId
            </td>
            <td>
                @stu.Name
                
            </td>
            <td>
               @stu.Address
            </td>
            <td>
                @Html.ActionLink("Edit""Edit"new { id = @stu.StudentId }) | 
                @Html.ActionLink("Delete""Delete"new { id = @stu.StudentId }) 
            </td>
        </tr>
    }
 
</table>


3. Run and see the result ..

Add Documents


Here is sample async code for insert element to the Mongo Context

[HttpPost]
       [ValidateAntiForgeryToken]
       public async Task<ActionResult> Create([Bind(Include = "StudentId,Name,Address")] Student student)
       {
           try
           {
               //Insert one item 
               await _context.Students.InsertOneAsync(student);
               return View();
 
           }
           catch (Exception)
           {
               return View(student);
           }
 
       }
 

Filter Elements

private Student GetStudent(int id)
        {
            //Filter element
            var std = _context.Students
                .Find(r => r.StudentId == id)
                .FirstOrDefault();
            return std;
        }


Update Or Replace Element 

[HttpPost]
       [ValidateAntiForgeryToken]
       public async Task<ActionResult> Edit([Bind(Include = "id,StudentId,Name,Address")] Student student)
       {
           //Full update /replace
           // await _context.Students.ReplaceOneAsync(r => r.StudentId == student.StudentId, student);
          
           //Partial Update
           var update = Builders<Student>.Update.Set(s => s.Name, student.Name);
           await _context.Students.UpdateOneAsync(r => r.StudentId == student.StudentId, update);
           return RedirectToAction("index");
       }


Delete element


public async Task<ActionResult> Delete(int id)
       { 
           //Delete element           
           await _context.Students.DeleteOneAsync(s=> s.StudentId==id);
           return RedirectToAction("index");
       }


Full code In Git ..

https://github.com/prabathsl/DI_Sample


 Enjoy Coding


Tuesday, February 23, 2016

Dependancy Injection With Unity

In Last post I gave you introduction for dependency  Injection.

Here we gonna Use it in real code

First I create MVC project and Add following classes to it.

public interface IUserService
   {
       string GetUserName(string name);
   }
 
public class UserService : IUserService
    {
        public string GetUserName(string name)
        {
            return string.Format("Hello {0}", name);
        }
    } 


Here is my folder structure


Then  I create My MVC UserController and Its View. Code is same as I did in prev post

public class UserController : Controller
   {
       private IUserService _userService;
 
       public UserController(IUserService userService)
       {
           _userService = userService;
       }
       // GET: User
       public ActionResult Index()
       {
           ViewBag.UserMessage = _userService.GetUserName("Dependency Unity");
           return View();
       }
   }

Here is View

@{
    ViewBag.Title = "Index";
}
 
<h2>@ViewBag.UserMessage</h2> 
 
 
 That's all. 

Now I'm gonna install Unity Nuget package for DI framework


 Then real Dependency Injection begins.

Main Focus  
  1. Register
  2. Resolver
 We use dependency Injection Register for register dependency  and resolver for resolve dependency.  It will be done by Unity framework for you if you implement it


1. Create Class DI_Register 

public static class Di_Register
    {
        /// <summary>
        /// Register And resolver of Dependency 
        /// </summary>
        public static void RegisterDependancy()
        {
            IUnityContainer container = new UnityContainer();
            RegisterDependancy(container);
 
            DependencyResolver.SetResolver(new UserResolver(container));
        }
 
        /// <summary>
        /// Type registration
        /// </summary>
        /// <param name="container"></param>
        private static void RegisterDependancy(IUnityContainer container)
        {
            container.RegisterType<IUserServiceUserService>();
        }
    }
 

2. Create UserResolver Class for dependency resolving. It will  using the Unity's IDependancyResolver Interface for resolving implementation . It eill take care of your dependency resolving 


/// <summary>
   /// Resolver 
   /// </summary>
   internal class UserResolver : IDependencyResolver
   {
       private IUnityContainer _unityContainer;
 
       public UserResolver(IUnityContainer unityContainer)
       {
           _unityContainer = unityContainer;
       }
 
       /// <summary>
       /// For one object 
       /// </summary>
       /// <param name="serviceType"></param>
       /// <returns></returns>
       public object GetService(Type serviceType)
       {
           try
           {
               return _unityContainer.Resolve(serviceType);
           }
           catch (Exception)
           {
 
               return null;
           }
       }
 
       /// <summary>
       /// For multiple objects 
       /// </summary>
       /// <param name="serviceType"></param>
       /// <returns></returns>
       public IEnumerable<object> GetServices(Type serviceType)
       {
           try
           {
               return _unityContainer.ResolveAll(serviceType);
 
           }
           catch (Exception)
           {
 
               return null;
           }
       }
   }

 3. Then go to the AppStart (startup.auth.cs) and call dependency register in application bigining

Di_Register.RegisterDependancy(); 


 Then Run and see the magic :)


Full code In Git ..

https://github.com/prabathsl/DI_Sample


 Enjoy Coding


Friday, January 22, 2016

Dependency Injection - Intro

This gonna be post series which I gonna continue .. Because this is bit complex and without theoretical part hard to understand.

Fist thing first.. Lets move with theoretical background of it with this post

 Assume this scenario.. - Entire Post sequence will use  this as example
There is student registration system we need to develop solution for student registration  

Here is our usual MVC code.


public class Student
   {
       public int StudentId { getset; }
       public string StudentName { getset; }
       public string RegId { getset; }
       public int Age { getset; }
 
 
       public IEnumerable<Student> GetStudents()
       {
           return new List<Student>();
       }
   }
 
Model Class 
 
public class StudentController : Controller
    {
        private readonly Student _student;
        public StudentController()
        {
            _student = new Student();
        }
        // GET: /<controller>/
 
        public IActionResult Index()
        {
            var data = _student.GetStudents();
            return View(data);
        }
    }
Controller Class 


In this way Model and controller is tightly coupled ( change of one class will effect other ) .  This way is not good in large scale projects a importantly. ( not recommend in any case )

You can find advantages and disadvantages of tight coupled code in OOP concepts.


  Dependency Injection


Dependency injection is the best way to create loose coupled code and resolve dependencies among the  classes .

In dependency injection some other class is responsible for injecting the dependencies in to client class(ex: Student Controller) we called it injector class at application run time.


here is object Diagram of it


Here is code how its look like with DI

public class Student:IStudent
   {
       public IEnumerable<Student> GetStudents()
       {
           return new List<Student>();
       }
   }
 
   public interface IStudent
   {
       IEnumerable<Student> GetStudents();
   }


public class StudentController : Controller
    {
        private readonly IStudent _student;
        public StudentController(IStudent student)
        {
            _student = student;
        }
        // GET: /<controller>/
 
        public IActionResult Index()
        {
            var data = _student.GetStudents();
            return View(data);
        }
    }
 
Enjoy Coding .. next post is on the way

Thursday, January 21, 2016

Web API From Code (Entity frameworkk code first model)

If you going to target mobile based applications to the small business you need to have API/web service on the hand.

Today we are going to develop Web API within few minutes.

Im using entity framework code first model approach here. (You can use same approach with Asp.NET web sites too) 

Advantages of Code first Model
  • All handle in the code. Full control with the code
  • No need to worry about the database

Here is the scenario today im working.

There is DVD rental store. Which each user can get one or more movie dvd's . 


1. Create Asp.NET web API project
2. Then Add the following classes to it in model

TransactionId is auto increment 

/// <summary>
/// User Db Model 
/// </summary>
public class User
{
    public Guid UserId { getset; }
    public string UserName { getset; }
    public string NIC { getset; }
    public DateTime BirthDay { getset; }
 
    //One user may have multiple transactions
    public virtual ICollection<Transaction> Transactions { getset; }
}

/// <summary>
/// Video Db Model
/// </summary>
public class Video
{
    public Guid VideoId { getset; }
    public string VideoName { getset; }
    public string Publisher { getset; }
 
    //One video may have multiple transactions 
    public virtual ICollection<Transaction> Transactions { getset; }
}

/// <summary>
/// Transaction db model
/// </summary>
public class Transaction
{
    [DatabaseGenerated(DatabaseGeneratedOption.Computed)]
    public int TransactionId { getset; }
    public Guid UserId { getset; }
    public Guid VideoId { getset; }
    public DateTime ReserveDate { getset; }
    public DateTime ReturnDate { getset; }
 
    //Add forign key 
    public virtual Video Video { getset; }
    public virtual User User { getset; }
} 

3. Install Entity Framework
4. Create Db Context file (RentalContext)
/// <summary>
/// Database context 
/// </summary>
public class RentalContext:DbContext
{
    public RentalContext():base("RentalContext")
    {
 
    }
 
    /******************Database tables ******************/
    public DbSet<User> UserSet { getset; }
    public DbSet<Video> VideoSet { getset; }
    public DbSet<Transaction> TranactionSet { getset; }
 
    protected override void OnModelCreating(DbModelBuilder modelBuilder)
    {
         base.OnModelCreating(modelBuilder);
    }
}

5. Then create Db initialize to change database when any changes happen with model
***With few sample data

public class RentalInitilizer : DropCreateDatabaseIfModelChanges<RentalContext>
{
    /// <summary>
    /// Add sampe data to the database 
    /// </summary>
    /// <param name="context"></param>
    protected override void Seed(RentalContext context)
    {
        List<User> Users = new List<User>()
        {
            new User(){BirthDay=Convert.ToDateTime("1990-05-03"),NIC="90563247855V",UserId=new Guid("93d82550-eefb-4b08-aab9-aa0cf8f3309f"),UserName="Dummy User1"},
            new User(){BirthDay=Convert.ToDateTime("1990-05-03"),NIC="90563247855V",UserId=new Guid("93d92550-eefb-4b08-aab9-aa0cf8f3309f"),UserName="Dummy User2"},
            new User(){BirthDay=Convert.ToDateTime("1990-05-03"),NIC="90563247855V",UserId=new Guid("93d82550-eefb-4b08-aab9-aa0cf8f3309f"),UserName="Dummy User3"}
 
        };
 
        Users.ForEach(x => context.UserSet.Add(x));
 
        List<Video> Videos = new List<Video>()
        {
            new Video(){Publisher="Publisger 1",VideoId=new Guid("4fb4912c-6f7d-4d34-8fd0-9ec641ae328d"), VideoName="Video 1"},
            new Video(){Publisher="Publisger 2",VideoId=new Guid("bcfc276a-8c41-40ad-bb7b-05731dbfcce5"), VideoName="Video 2"},
            new Video(){Publisher="Publisger 3",VideoId=new Guid("6a95ce93-6b9d-4d29-9bb0-fb69e2bb53bb"), VideoName="Video 6"}
 
        };
        Videos.ForEach(x => context.VideoSet.Add(x));
 
        List<Transaction> Transactions = new List<Transaction>()
        {
            new Transaction(){ReserveDate=DateTime.Now,ReturnDate=DateTime.Now.AddDays(5),UserId= new Guid("93d82550-eefb-4b08-aab9-aa0cf8f3309f"),VideoId=new Guid("6a95ce93-6b9d-4d29-9bb0-fb69e2bb53bb")},
            new Transaction(){ReserveDate=DateTime.Now,ReturnDate=DateTime.Now.AddDays(5),UserId= new Guid("93d82550-eefb-4b08-aab9-aa0cf8f3309f"),VideoId=new Guid("bcfc276a-8c41-40ad-bb7b-05731dbfcce5")}
 
        };
        Transactions.ForEach(x => context.TranactionSet.Add(x));
 
        context.SaveChanges();
        
       base.Seed(context);
    }
}
 

6. Edit the config
Add context to the entity framework
  <entityFramework>
    <defaultConnectionFactory type="System.Data.Entity.Infrastructure.LocalDbConnectionFactory, EntityFramework">
      <parameters>
        <parameter value="mssqllocaldb" />
      </parameters>
    </defaultConnectionFactory>
    <providers>
      <provider invariantName="System.Data.SqlClient" type="System.Data.Entity.SqlServer.SqlProviderServices, EntityFramework.SqlServer" />
    </providers>
    <contexts>
      <context type="SEF_CodeFirst_API.Models.DbModels.RentalContext, SEF_CodeFirst_API">
        <databaseInitializer type="EF_CodeFirst_API.Models.DbModels.RentalInitializer, SEF_CodeFirst_API" />
      </context>
    </contexts>
  </entityFramework>

Add the  Connection string
 <connectionStrings>
    <add name="RentalContext" 
 connectionString="Data Source=(LocalDb)\v11.0;Initial Catalog=Rental;Integrated Security=SSPI;" 
 providerName="System.Data.SqlClient" />
  </connectionStrings>


Then  you have to create Controller's from Entity framework with read write options.. you are in


Enjoy


Sunday, June 7, 2015

Alternative way for enable developer mode in windows 10 device

Hi ,

Have you ever seen bug when going to enabling developer mode in windows 10 preview (IP)? The application crashes.

Now how we enable developer mode for application development ?

There is option available. When we are deploying apps with side loading in windows 8/8.1 we are doing the policy editing to allow app installation in client machine. the same is helpfull here too

Open your group policy editor  -> Computer Configurations-> Administrative templates -> Windows Components -> App Package development 

In there enable
Allow development of windows store apps and installing them from integrated development environment ...
and
allow all trusted apps to install 


You are done and enjoy  

Saturday, April 4, 2015

Server Socket (TCP) With Microsoft Azure

When we working on the real time applications Microsoft azure provides the facilities to run our all kind of applications from oldest to latest technologies. With my earlier post i explained how to create SignalR applications for real time operations

Today I'm gonna introduce create Server socket with the Azure .


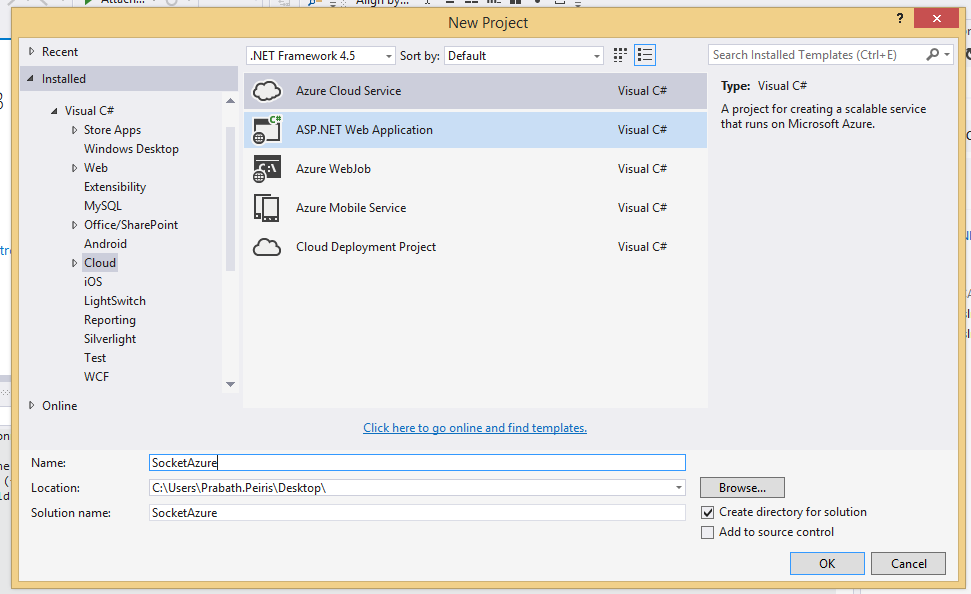
1. Create new Azure Cloud project


2. Create new Azure Worker Role  with the solution. I named it as Socket Worker 


3. Then you need to add endpoint to Worker role. If you are working on TCP Just add TCP endpoint in the worker role  as follows


External clients use public port to send traffic to service using public port

actually they send traffic through this port .  Here is how people send traffic http://mysitedomain:2020/

Azure load balancer send the traffic (re route the traffic to Worker Role) through the private port to the Virtual Machine that run the worker role

(More)

4. Then Create your regular TCP Listener (It  may be UDP/TCP/Http/Https, Azure support all  ) Code inside the run

Replace the Run() as following with auto reset event

private AutoResetEvent connectionWaitHandle = new AutoResetEvent(false);
public override void Run()
       {
           TcpListener listener = null;
           try
           {
               //Create TCp Listener to Listen endpoint define in the Worker Role
               listener = new TcpListener(RoleEnvironment.CurrentRoleInstance.InstanceEndpoints["TcpEndpoint"].IPEndpoint);
               listener.ExclusiveAddressUse = false;
               listener.Start();
           }
           catch (SocketException)
           {
               Trace.Write("Echo server could not start.""Error");
               return;
           }
 
           //Listen to the all requests 
           while (true)
           {
               //Handle requests Asynchronously 
               IAsyncResult result = listener.BeginAcceptTcpClient(HandleAsyncConnection, listener);
               connectionWaitHandle.WaitOne();
           }
       }

5. Then create Async request handle with following. **All important areas are commented


      /// <summary>
/// Handle Async requests 
/// </summary>
/// <param name="result"></param>
private void HandleAsyncConnection(IAsyncResult result)
{
    // Accept connection 
    TcpListener listener = (TcpListener)result.AsyncState;
    TcpClient client = listener.EndAcceptTcpClient(result);
    connectionWaitHandle.Set();
 
    // Setup reader/writer 
    NetworkStream netStream = client.GetStream();
    StreamReader reader = new StreamReader(netStream);
    // Show application 
    string input = string.Empty;
    while (true)
    {               
 
        //Get the input line 
        input = reader.ReadLine();
 
        Trace.TraceInformation(input);
    }
    // Done! 
    client.Close();
}

Run and enjoy  :)


Full Code In Media Fire 
http://bit.ly/SocketAzure